Have you ever wondered what goes into the process of plastering a wall? From the different types of plaster to the essential tools and materials needed, there are several key steps involved in achieving a smooth and flawless finish.
We will explore the importance of plastering, the various types of plaster available, the necessary tools for the job, and a step-by-step guide on how to plaster a wall successfully.
Additionally, we’ll share some valuable tips to ensure your plastering project is a success. Let’s dive in!
What Is Plastering?
Plastering is the process of applying a smooth, durable finish to walls, ceilings, or other surfaces using a mixture of materials like plaster, cement, or gypsum.
This technique not only improves the appearance of the surfaces but also enhances their structural integrity. Plastering plays a vital role in creating a polished and clean look for the interiors and exteriors of buildings. It helps to conceal imperfections, provide a level base for painting or wallpaper, and protect the underlying structure from moisture and wear. Common surfaces where plastering is applied include drywall, concrete, brick, and wood. By adding a layer of plaster, these surfaces become more resilient, long-lasting, and visually appealing.
Uncover more: What Paint Do You Use After Plastering
Why Is Plastering Important?
The importance of plastering lies in its ability to provide a smooth, uniform surface that enhances the visual appeal of a room while also improving the structural integrity and durability of the walls.
Plastering plays a crucial role in construction and renovation projects, as it creates a sturdy base for paint and finishes, ensuring a long-lasting and polished final look. A well-plastered wall not only contributes to the aesthetics of a space but also serves as a protective barrier, shielding the underlying structure from wear and tear. By filling in imperfections and creating a seamless surface, plastering helps in achieving a high-quality finish that is both visually pleasing and structurally sound.
What Are The Different Types Of Plaster?
Plastering offers a variety of options, including lime plaster, cement plaster, gypsum plaster, and clay plaster, each with unique properties and applications.
- Lime plaster, with its traditional composition of sand, water, and lime, is ideal for historic restoration projects due to its breathable and flexible nature, allowing old buildings to maintain their integrity.
- Cement plaster, known for its durability and strength, is commonly used in modern construction for its ability to withstand harsh weather conditions.
- Gypsum plaster, prized for its smooth finish and fire-resistant properties, is often used in interior walls and ceilings for a polished appearance while offering added safety.
- Clay plaster, favored for its natural and sustainable components, provides excellent insulation, making it a preferred choice for eco-friendly designs and non-toxic environments.
Lime Plaster
Lime plaster is a traditional material used for plastering that offers a breathable, durable finish suitable for historical restorations and eco-friendly construction projects.
Its unique characteristics make it an excellent choice for maintaining the integrity of heritage buildings. Lime plaster has the ability to regulate moisture, preventing issues like mold and dampness. When applied correctly, it creates a smooth, textured surface that adds a classic charm to any architectural design.
One of the key benefits of lime plaster is its versatility, allowing for easy restoration and repair over time. The application methods for lime plaster involve a careful blend of hydrated lime, sand, and water, delivering a natural aesthetic with minimal environmental impact.
Cement Plaster
Cement plaster is a popular choice for its strength and versatility, providing a robust surface ideal for modern construction projects and exterior applications.
It offers excellent adhesive properties, ensuring long-lasting bonding with surfaces like brick, concrete, and blockwork. In addition to its durability, cement plaster is resistant to weathering and moisture, making it suitable for both interior and exterior use. Its strong composition acts as a protective layer, enhancing the structural integrity of buildings and reducing maintenance costs in the long run. This reliability and performance make cement plaster particularly beneficial in high-traffic areas, such as commercial buildings, schools, and hospitals.
Gypsum Plaster
Gypsum plaster is valued for its exceptional smoothness and ease of application, making it a preferred choice for achieving flawless finishes in interior spaces.
It is a versatile material that can be applied to various substrates, such as brick, block, concrete, and drywall. One of the key attributes of gypsum plaster is its ability to provide a seamless surface that is ideal for intricate designs and decorative finishes. Its quick drying time makes it a practical option for projects that require efficient completion. Gypsum plaster is known for its durability and resistance to cracking, ensuring long-lasting results that maintain their aesthetic appeal over time.
Clay Plaster
Clay plaster stands out as an eco-friendly option known for its natural texture, moisture-regulating properties, and aesthetic appeal in modern sustainable construction.
Its unique composition not only helps in maintaining indoor humidity levels but also contributes to a healthier living environment by regulating moisture and absorbing odors. The clay plaster’s earthy tones and varied textures add warmth and character to interior spaces, creating a cozy and inviting atmosphere. Designers and homeowners alike appreciate the versatility of clay plaster, as it can be easily customized to achieve different finishes, from smooth and polished to rough and rustic, enhancing the visual interest of walls and ceilings.
What Tools And Materials Are Needed For Plastering?
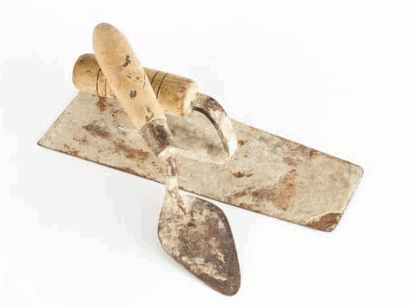
Plastering requires essential tools such as a trowel, plastering float, plastering hawk, bucket, mixing paddle, sandpaper, and plastering mesh, along with materials like plaster mix for a successful application.
These tools play vital roles in different stages of the plastering process. The trowel is used for applying and smoothing the plaster mixture onto surfaces, while the plastering float helps in achieving a uniform finish. The plastering hawk provides a convenient platform for holding and transporting the plaster mix. A bucket is necessary for mixing the plaster compound, and a mixing paddle ensures proper consistency. Sandpaper is essential for refining the surface texture, and plastering mesh aids in reinforcing the plaster for increased durability.
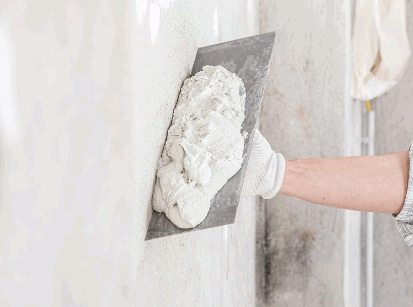
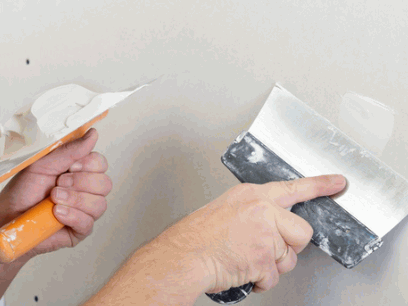
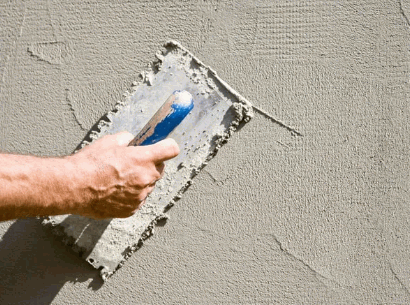
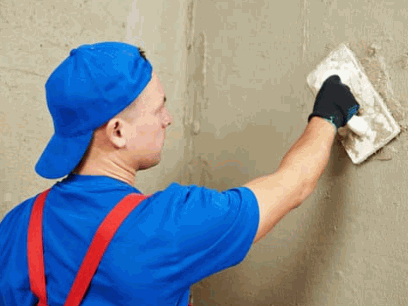
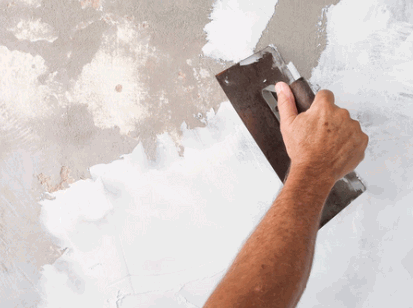
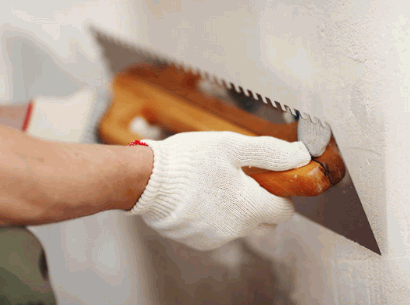
Trowel
The trowel is a vital tool in plastering, used for applying and smoothing plaster to create a uniform finish on walls and ceilings.
It plays a crucial role in achieving a professional and polished look on any surface. The proper selection of trowel size, shape, and material is essential for different types of plaster applications.
By skillfully manipulating the trowel, one can control the thickness and distribution of plaster, ensuring an even coat. The finesse with which the trowel is handled determines the smoothness and texture of the final surface.
Understanding the angle and pressure applied while using the trowel can vastly impact the quality of the plaster finish.
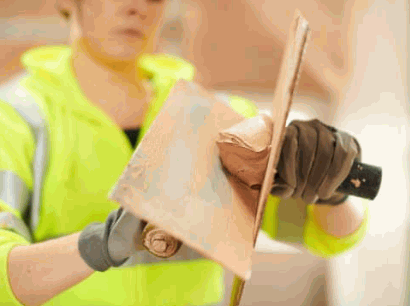
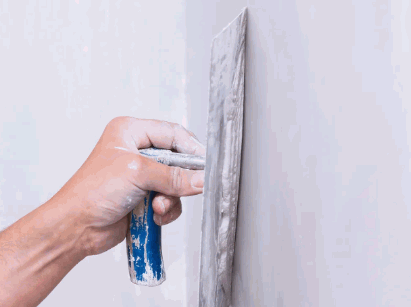
Plastering Float
A plastering float is indispensable for achieving a smooth and even surface when applying plaster, facilitating the leveling and finishing of plaster coatings.
It plays a crucial role in ensuring that the plaster is spread evenly across the surface, reducing the likelihood of uneven patches and bumps. By using a plastering float, you can effectively manipulate the consistency of the plaster and create a more uniform finish.
The key to using a float effectively lies in making smooth, sweeping motions in different directions to level the plaster and remove excess material, resulting in a professional-looking surface. Proper technique involves holding the float at a slight angle and applying just the right amount of pressure to achieve the desired smoothness.
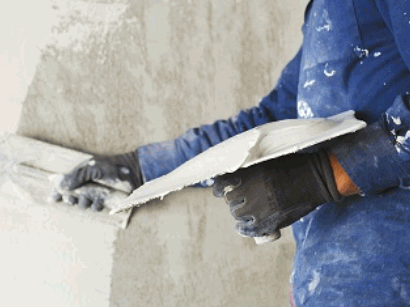
Plastering Hawk
A plastering hawk is a handy tool for holding and transporting plaster during application, providing a convenient way to access and work with the plaster mixture.
The hawk, with its flat surface and handle, allows the plaster to be easily scooped and held in place while working on walls or ceilings. By using a plastering hawk, professionals can maintain a consistent supply of plaster, ensuring a smooth and efficient application process. To effectively use a hawk, one should tilt it at a slight angle and apply the plaster with a trowel in smooth motions, making it a crucial tool for achieving precise and even plaster finishes.
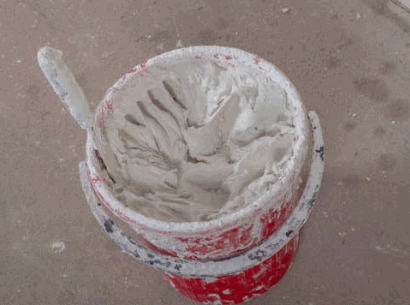
Bucket
A bucket is essential for mixing plaster with water to achieve the desired consistency before application, ensuring that the plaster mixture is well-prepared for the task at hand.
The role of a bucket in the plastering process goes beyond just being a container; it serves as a crucial tool for maintaining control over the water-to-plaster ratio. By using a bucket, plasterers can measure the exact amount of water needed, ensuring that the plaster mix is not too runny or too dry. This precision is vital for achieving a smooth and even application of plaster on walls or ceilings. Properly mixing plaster materials in a bucket helps to avoid inconsistencies in texture and strength, leading to a professional finish.
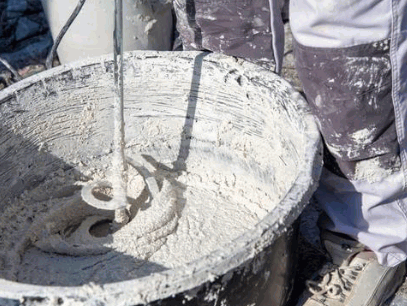
Mixing Paddle
A mixing paddle is a critical tool for achieving a uniform and well-mixed plaster consistency, ensuring that the plaster mixture is homogeneous and ready for application.
It plays a crucial role in breaking down clumps, dispersing additives evenly, and incorporating air to create a smooth and workable plaster mix.
To effectively use a mixing paddle, it’s important to start by adding the appropriate amount of water to the mixing container before slowly pouring in the plaster powder. By using a back-and-forth motion and varying speeds, the paddle effectively blends the materials, ensuring a consistent texture throughout. Proper technique with the mixing paddle can make a significant difference in the quality of the plaster finish.
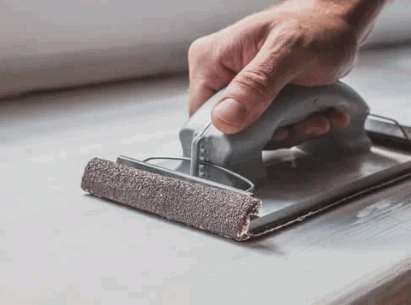
Sandpaper
Sandpaper is essential for smoothing and refining the surface of dried plaster, allowing for the removal of imperfections and achieving a polished finish.
The coarse grit of sandpaper is typically used first to level out any larger bumps or inconsistencies in the plaster surface, followed by progressively finer grits to smooth it further. By sanding down imperfections such as ridges, bumps, or rough patches, the surface becomes more even and ready for priming or painting.
Techniques such as using a light touch, applying even pressure, and sanding in a circular or back-and-forth motion help achieve a seamless and flawless finish on the plastered surface.
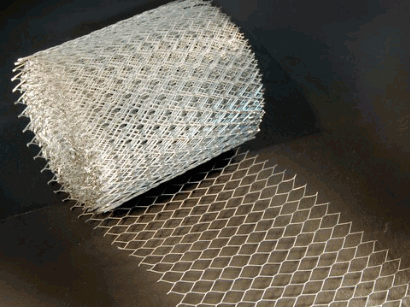
Plastering Mesh
Plastering mesh is a reinforcement material used to strengthen surfaces, prevent cracks, and improve adhesion for plaster coats, ensuring long-lasting and durable results.
The application of plastering mesh in plastering projects plays a crucial role in providing added stability to the surface being worked on. Embedding the mesh within the plaster layers helps distribute any stress or pressure exerted on the surface, reducing the likelihood of cracks forming over time. The mesh acts as a barrier that minimizes the risk of hairline cracks developing, especially in areas prone to structural movement. This proactive approach not only enhances the overall strength of the plaster but also contributes to a smoother and more even finish.
What Are The Steps For Plastering A Wall?
Plastering a wall involves several key steps, starting with thorough preparation, followed by the application of plaster coats, and ending with finishing touches to achieve a smooth and professional finish.
- The first step in plastering a wall is to prepare the surface by ensuring it is clean, free of dust and well-primed to promote adhesion.
- Next, mix the plaster following the manufacturer’s instructions, ensuring a smooth and lump-free consistency.
- Begin applying the plaster in even strokes, starting from the top and working your way down, maintaining a consistent thickness.
- Use a trowel to spread the plaster evenly, filling any gaps and smoothing out imperfections.
- Once the plaster is set but not fully dry, finish by polishing the surface with a trowel or float to achieve a polished look.
Preparation
Preparation is crucial in plastering projects and involves cleaning the surface, repairing cracks, and ensuring the wall is ready to receive the plaster for optimal adhesion and finish.
- Cleaning the surface thoroughly is the initial step, removing any dirt, dust, or other debris that could hinder the plaster’s adhesion.
- Following this, repairing cracks and imperfections in the wall surface is essential to avoid any issues later on. By assessing the wall conditions meticulously, such as checking for moisture or structural issues, you can prevent potential problems during the plastering process.
These preparatory steps are vital as they create a smooth and stable foundation, ensuring that the plaster adheres properly and results in a high-quality finish.
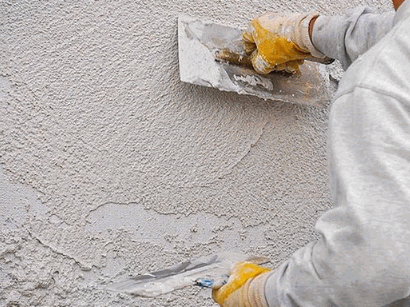
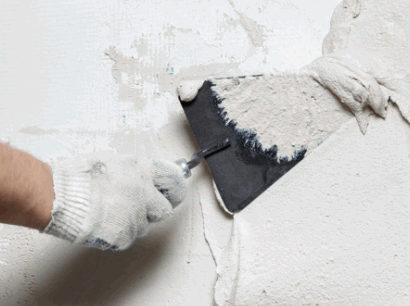
Applying The First Coat Of Plaster
Applying the first coat of plaster involves mixing the plaster to the right consistency, and using the appropriate technique to spread and level the plaster evenly on the wall surface.
To start the process, it is crucial to have the correct ratio of plaster to water to achieve a smooth and workable mixture. Once the plaster is prepared, begin applying it to the wall with a trowel, starting from the bottom and working upwards. Use long, even strokes to spread the plaster uniformly, ensuring there are no bumps or uneven patches. Pay close attention to the corners and edges, as these areas can be tricky to cover seamlessly. Remember, the key is to work efficiently and swiftly while maintaining precision in the application.
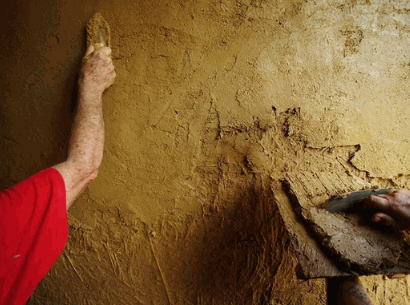
Applying The Second Coat Of Plaster
The second coat of plaster aims to achieve a smooth and uniform finish, addressing any imperfections from the first coat and ensuring a bubble-free surface for the final result.
- This crucial step in the plastering process requires attention to detail and precision.
- To start, mix the plaster to the right consistency for easy application onto the first coat.
- Apply the second coat evenly using a trowel, ensuring that it is spread in a thin layer across the surface.
- To prevent bubbles, tap lightly on the plaster with your trowel to release any trapped air.
- Once the plaster sets but is still workable, smooth out any imperfections or ridges using a damp sponge or float.
- This technique helps create a flawless surface ready for the final touches.
Finishing Touches
The final stage of plastering involves sanding the surface for smoothness, applying a primer coat for enhanced adhesion, and executing any finishing touches to ensure a polished and professional outcome.
These finishing touches play a crucial role in delivering a flawless final appearance to the plastered surface. A meticulous approach to sanding ensures that the surface is even and free of imperfections, providing a solid foundation for subsequent layers.
The application of a primer coat not only enhances adhesion but also helps in creating a uniform base for the final coat to adhere to, ensuring better durability and a more consistent finish.
The final coat brings the entire project together, covering any remaining flaws and adding a protective layer that enhances the aesthetic appeal and longevity of the plastered surface.
What Are Some Tips For A Successful Plastering Job?
To ensure a successful plastering job, it is essential to keep the surface clean and damp, use the correct water-to-plaster ratio, work efficiently, and address imperfections promptly for a flawless finish.
- Maintaining the surface is crucial, as any debris or loose particles can affect the adhesion of the plaster. Finding the right water consistency plays a significant role in achieving a smooth texture and proper drying.
- Working efficiently involves planning ahead, using the right tools, and applying each coat evenly. It’s also important to inspect the surface for imperfections during the process and fix them before the plaster sets. These practices can make a big difference in the outcome of your plastering project.
Keep The Surface Clean And Damp
Maintaining a clean and damp surface is vital in plastering to ensure proper adhesion and workability of the plaster mixture, preventing issues such as uneven drying or adhesion failure.
A meticulously cleaned surface provides a smooth foundation for the plaster to adhere to, promoting a stronger bond that enhances the overall durability of the plaster finish.
The presence of moisture on the surface helps control the drying time of the plaster, allowing for a more consistent and controlled setting process.
Inadequate surface preparation can lead to flaking, cracking, or poor finish quality, highlighting the significance of thorough cleaning and moisture management in plastering projects.
Use The Correct Ratio Of Water To Plaster
Maintaining the correct ratio of water to plaster is essential for achieving the right consistency in the plaster mix, ensuring optimal workability and finish quality.
This ratio plays a crucial role in determining how well the plaster adheres to the surface being worked on. A proper water-to-plaster ratio not only affects the mix’s fluidity but also impacts the setting time and overall strength of the plaster.
Too much water can lead to a runny mix that is challenging to spread evenly, leading to cracks and uneven surfaces. On the other hand, insufficient water can result in a stiff mix that is difficult to work with and may not bond properly with the substrate.
Striking the right balance between water and plaster is key to achieving a smooth application and a durable, long-lasting plaster finish.
Work Quickly And Efficiently
Working swiftly and efficiently during plastering projects is key to achieving even finishes, reducing drying time, and minimizing effort for a more productive and successful outcome.
Implementing certain techniques can significantly enhance the speed and quality of your plastering work. Using the right tools, such as trowels and floats, can help you apply plaster quickly and smoothly. Mastering the proper wrist movements and pressure control will ensure a uniform and flawless finish in record time. Effective time management, like prepping the surface adequately and having all materials ready, can streamline the process and prevent delays. By prioritizing speed and efficiency, you not only save time and effort but also deliver superior results for your clients.
Smooth Out Any Imperfections
Addressing imperfections such as bubbles or uneven surfaces promptly is crucial for maintaining a smooth and level plaster finish, ensuring professional results and aesthetic appeal.
By vigilantly inspecting the freshly applied plaster for any irregularities like air bubbles, indentations, or protrusions, one can take steps to rectify these issues before they harden. Techniques such as using a wet sponge to gently press out bubbles or employing a trowel to level out uneven patches can greatly improve the overall surface quality. Achieving flawless finishes involves consistent monitoring and adjustment throughout the plastering process to guarantee a seamless and polished outcome.