Epoxy flooring has gained popularity for its durability and aesthetic appeal, especially in garages where heavy use is common.
This guide covers everything you need to know about epoxy flooring, from understanding what it is to the benefits it offers specifically for garage spaces.
It includes the necessary materials and tools, preparation steps, application techniques, and maintenance tips to ensure your garage floor remains in top condition.
Dive in to discover how epoxy flooring can transform your garage into a functional and stylish area.
What Is Epoxy Flooring?
Epoxy flooring is a high-performance floor coating system that consists of a resin and hardener, which when mixed together undergo a chemical reaction to create a seamless, durable surface designed to withstand heavy wear and tear. This type of flooring is commonly used in residential and commercial settings due to its exceptional durability, chemical resistance, and aesthetic appeal.
Explore in-depth: How To Install A Resin Floor In My Kitchen
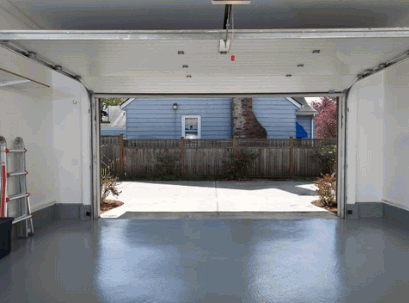
Why Use Epoxy Flooring In A Garage?
Using epoxy flooring in a garage offers numerous advantages for homeowners, primarily due to its durability and chemical-resistant properties, making it an ideal choice for spaces that are frequently exposed to motor oil, gas, and other potentially damaging substances. This flooring not only enhances the aesthetic appeal of the garage but also simplifies maintenance and protection against staining and abrasive damage.
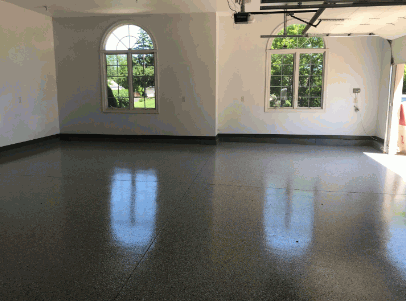
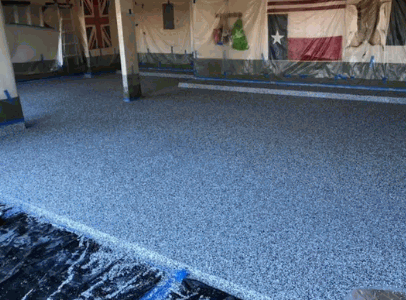
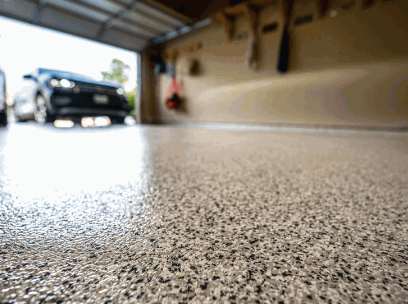
What Are The Benefits Of Epoxy Flooring In A Garage?
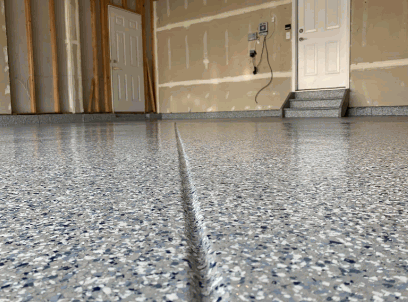
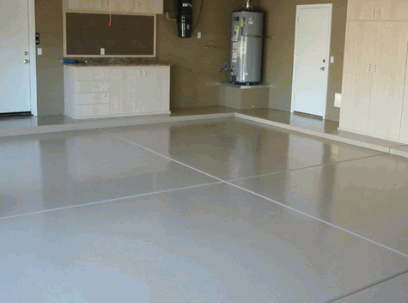
The benefits of epoxy flooring in a garage are numerous, including its exceptional durability, chemical resistance, and ease of maintenance, making it a preferred choice for many homeowners. The aesthetic options available, such as color chips and custom designs, allow for personalization while providing a long-lasting, protective surface that can withstand heavy use.
For those seeking a reliable flooring solution, epoxy flooring presents a remarkable alternative that combines functionality with style. Not only does it resist stains from oil and chemicals commonly found in garages, but it also offers a seamless surface, minimizing the crevices where dirt and grime can accumulate.
The installation process is straightforward, providing quick turnaround times so that you can start utilizing your garage right away. Homeowners can enjoy the glossy finish and vibrant colors that enhance the overall appearance, making the space inviting and less utilitarian.
In essence, choosing epoxy flooring means opting for a visually appealing, robust surface that supports heavy-duty use without compromising on aesthetics.
What Materials And Tools Are Needed For Epoxy Flooring In A Garage?
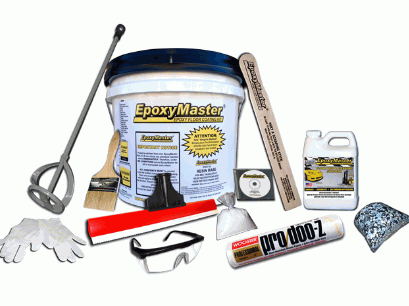
To successfully apply epoxy flooring in a garage, several materials and tools are required, including epoxy kits, paintbrushes, rollers, and safety gear such as safety glasses and a respirator to ensure proper protection during the installation process. Proper preparation and the right equipment are vital for achieving a durable and aesthetically pleasing epoxy surface.
What Type Of Epoxy Is Best For Garage Floors?
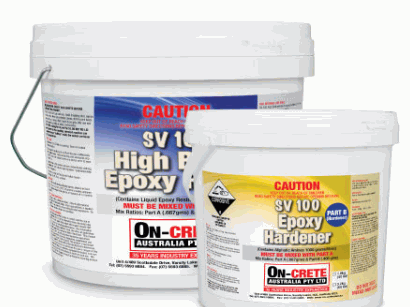
The best type of epoxy for garage floors is typically a high-quality, 100% solid epoxy, which offers superior durability and chemical resistance compared to other formulations, such as water-based epoxies. These epoxy kits are designed to withstand harsh automotive fluids, making them ideal for residential and commercial garage applications.
There are several variations of epoxy that cater to different needs and preferences.
- Water-based epoxy: This type is easier to apply and has lower odor levels, making it popular for DIY enthusiasts.
- Solvent-based epoxy: Known for its strong adhesion, this option provides a tough finish, though it may require more ventilation during application.
- Polyaspartic epoxy: This newer formulation cures quickly and provides high UV resistance, which is excellent for garages with natural light exposure.
Selecting high-quality options not only enhances the longevity of the floor but also reduces maintenance costs over the years, ensuring a resilient surface that can handle the rigors of a bustling garage environment.
What Other Materials Are Needed For Epoxy Flooring?
Along with epoxy kits, other materials needed for epoxy flooring include an etching solution for proper surface preparation, a paint tray for application, and color chips or flakes for decorative purposes, which enhance the flooring’s visual appeal. A hardener and resin are crucial for the chemical reaction that creates a durable floor surface.
Several additional materials play significant roles in ensuring the best results during the installation of epoxy flooring. These include:
- Paint Roller: Essential for spreading the epoxy evenly over the surface.
- Painter’s Tape: Useful for masking off areas that must remain free of epoxy and ensuring clean lines.
- Concrete Primer: This helps to improve adhesion and enhances the longevity of the epoxy once applied.
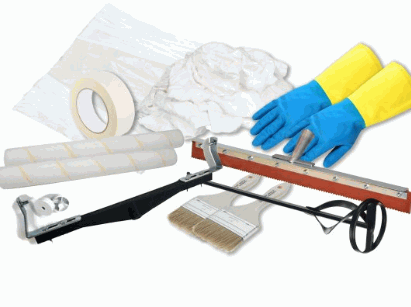
- Safety Gear: Includes gloves, goggles, and respirators to ensure the safety of the installers during the application process.
Each of these components is integral to achieving a smooth and attractive finish, which not only elevates the aesthetics but also maximizes the overall durability of the flooring solution.
How To Prepare The Garage Floor For Epoxy Flooring?
Preparing the garage floor for epoxy flooring is crucial for ensuring proper adhesion and a long-lasting finish, which involves several steps including cleaning the surface thoroughly, repairing any cracks, and applying an etching solution to create a rough texture. This preparation phase is essential to maximize the durability and aesthetic appeal of the final epoxy coating.
What Are The Steps For Preparing The Garage Floor?
The steps for preparing the garage floor for epoxy flooring include cleaning the surface with a scrub brush or wet/dry vacuum, repairing any existing cracks, and applying an etching solution to ensure optimal adhesion of the epoxy coating. Following these steps is crucial for achieving a professional-quality finish.
To begin with, effective cleaning is vital; it not only removes dirt and grease but also ensures the surface is ready for subsequent treatments. A thorough cleaning using a scrub brush or wet/dry vacuum is necessary to eliminate any debris that could interfere with adhesion.
Once the floor is dry, assessing for any cracks should be the next priority, as these imperfections can lead to further issues over time.
Repairing these cracks typically involves using a concrete filler, allowing it to cure completely before proceeding. After cracks have been addressed, applying an etching solution serves to enhance the surface texture, making it more conducive for epoxy bonding.
- Step 1: Clean thoroughly
- Step 2: Inspect and repair cracks
- Step 3: Apply etching solution
By meticulously following these steps, one can ensure a robust foundation for the epoxy finish.
How To Apply Epoxy Flooring In A Garage?
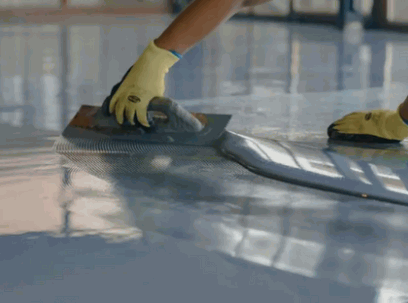
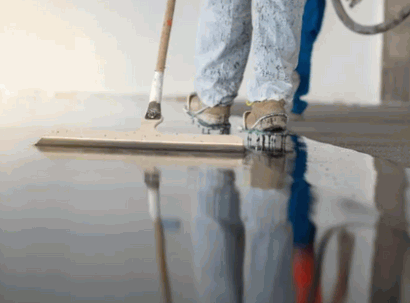
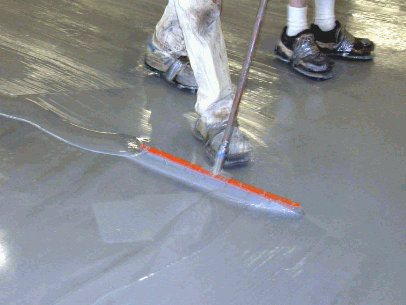
Applying epoxy flooring in a garage involves a systematic process that ensures a professional finish, starting with mixing the epoxy resin and hardener according to the manufacturer’s instructions, followed by applying the mixture using a paintbrush and roller for even coverage. Proper installation techniques are key to achieving a durable and visually appealing floor.
What Are The Steps For Applying Epoxy Flooring?
The steps for applying epoxy flooring include preparing the mixed epoxy, applying the first coat with a roller and paintbrush, allowing for adequate drying time, and finally applying a top coat for enhanced durability and protection.
Each step must be followed meticulously to ensure a successful installation.
To begin with, ensure the flooring surface is clean and free of any debris, as this can interfere with the adhesion process. When epoxy flooring is ready for mixing, make sure to follow the manufacturer’s instructions regarding the correct ratio of resin and hardener. This is crucial because improper mixing can lead to insufficient curing and compromised durability.
- Application Techniques: Using a roller will help achieve a smooth finish, while a paintbrush can assist in reaching edges and corners.
- Drying: After applying the first coat, it is essential to allow ample drying time; generally, 12 to 24 hours is recommended, depending on temperature and humidity.
- Top Coat: Sealing the flooring with a top coat not only enhances its longevity but also adds an extra layer of protection against stains and scratches, ensuring the flooring maintains its aesthetic appeal for years to come.
Following this detailed breakdown assures optimal results and a beautiful epoxy finish.
What To Do After Applying Epoxy Flooring?
After applying epoxy flooring, it is essential to follow specific steps to ensure the longevity and quality of the installation, including allowing for adequate drying time and adhering to maintenance recommendations to protect the surface from staining and damage. Proper post-installation care is crucial for maximizing the durability of the epoxy coat.
How Long Does Epoxy Flooring Take To Dry?
The drying time for epoxy flooring typically varies based on environmental conditions, but generally, it can take anywhere from 24 to 72 hours to fully cure, depending on the product used and the thickness of the application. It is essential to follow the manufacturer’s guidelines for optimal curing times to ensure a durable finish.
Several factors can significantly influence the curing process of epoxy flooring. Here are some key aspects to consider:
- Temperature: Warmer temperatures generally accelerate the curing process, making it crucial to maintain a consistent environment.
- Humidity: High humidity can extend drying times, impacting the overall finish quality.
- Air circulation: Adequate airflow can help to reduce moisture levels, promoting faster drying.
- Application thickness: Thicker layers of epoxy will inherently take longer to cure, thus requiring careful planning and application.
By understanding these factors, one can better manage expectations and ensure a successful project.
How To Maintain Epoxy Flooring In A Garage?
Maintaining epoxy flooring in a garage involves regular cleaning and upkeep practices to ensure its durability and appearance over time, including using a wet/dry vacuum for debris, gentle scrubbing with a non-abrasive cleaner, and avoiding harsh chemicals that could damage the coating. Proper maintenance will prolong the life of the epoxy surface.
Ensuring that the epoxy flooring remains free from spills and stains is crucial. Regular sweeping or dust mopping can help eliminate dirt and grit that may scratch the surface. It is advisable to:
- Use a pH-neutral cleaner specifically designed for epoxy surfaces to avoid any potential damage.
- Develop a routine cleaning schedule, ideally once a month, to remove grime and keep the floor looking pristine.
- Apply a fresh coat of epoxy when wear and tear begin to show, which can enhance the protective layer.
By adhering to these practices and focusing on the quality of cleaning products, one can maintain the aesthetic appeal and functionality of the flooring.

What Are The Safety Precautions For Applying Epoxy Flooring?
When applying epoxy flooring, it is crucial to adhere to safety precautions to protect yourself from harmful fumes and materials, including wearing personal protective equipment such as safety glasses, gloves, and a respirator during the installation process. Ensuring proper ventilation in the workspace is also key to reducing exposure to chemical reactions involved in epoxy application.
Along with these fundamental measures, it’s advisable to prepare the workspace by removing any unnecessary items and ensuring the area is clean and well-organized. The following points should also be emphasized:
- Always work in a well-ventilated area.
- Utilize exhaust fans to increase airflow.
- Store chemicals away from heat sources.
- Be aware of the recommended safety data sheets (SDS) for the specific epoxy products used.
- Keep a first-aid kit nearby, ready in case of accidental exposure.
By taking these precautions, you can effectively minimize risks and create a safer environment during your epoxy flooring project.
How Much Does It Cost To Apply Epoxy Flooring In A Garage?
The cost to apply epoxy flooring in a garage can vary significantly based on factors such as the size of the area, the type of epoxy kits used, and whether the installation is DIY or handled by a professional contractor.
When planning a garage flooring project, it is essential to assess the various elements that impact overall expenses. The materials chosen for the epoxy flooring play a crucial role; different epoxy formulations, such as solvent-based or water-based options, can range dramatically in price.
- The labor cost is another significant consideration—professional installers often charge varying rates per hour based on their expertise and the complexity of the installation.
- The size of the area influences material needs and labor time, with larger spaces likely requiring a greater budget.
Ultimately, by taking these factors into account, homeowners can ensure a more accurate and effective budget for their desired flooring outcome.